IHP Cloud migration guide
If you haven’t upgraded your IHP project in a while, we recommend upgrading to IHP v1.0 or before upgrading. This will also probably lead to a faster build.
It’s also recommended to turn off optimized mode in your default.nix to save initial build time.
For a very small project, one of the cheaper server sizes down at 1GB-2GB RAM should work well. 4GB RAM will probably be sufficient for most IHP Haskell applications. Give it a couple of tries and find a server size that suits you.
Provision a new Shipnix server
Since you already have a repository with an IHP project, you need to use the Load existing code starter.
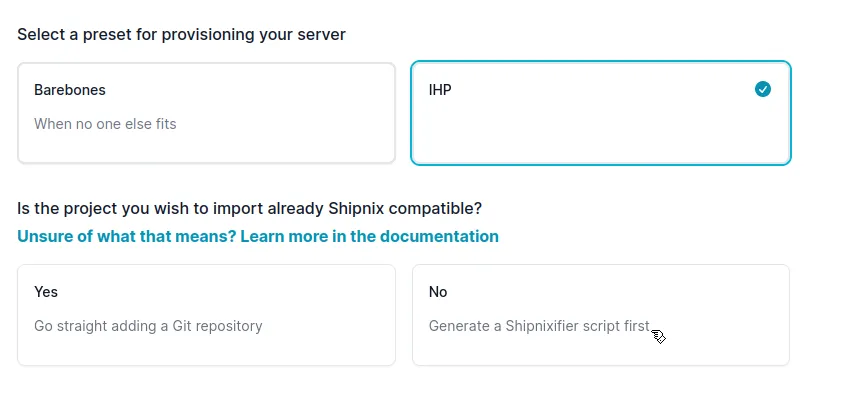
After the server is done provisioning, select the IHP preset on the first option, and No on the second option.
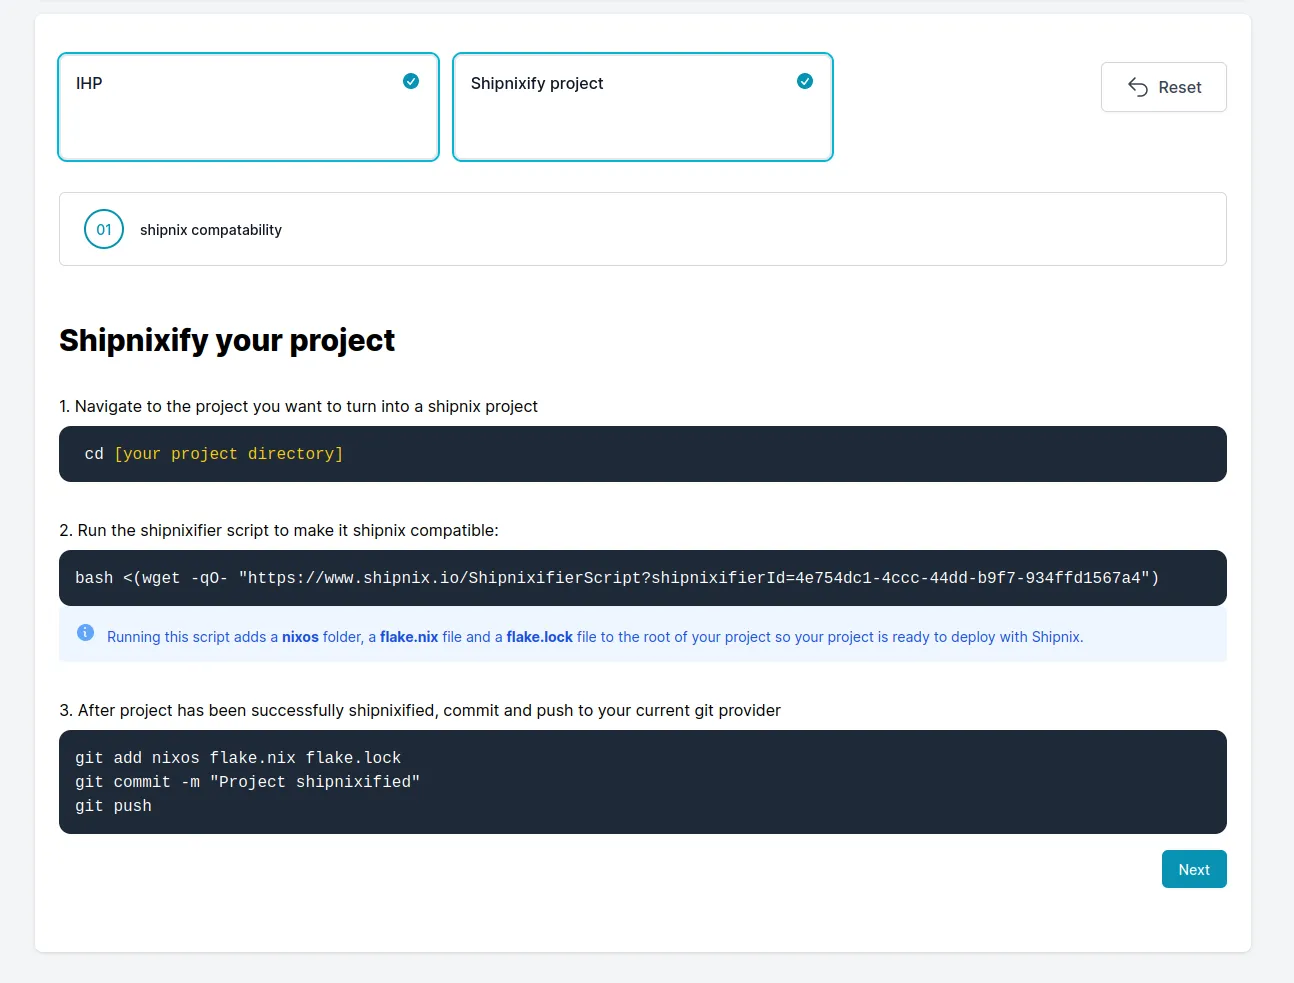
Shipnix will generate some starter code that you will need to extract to your project code repository.
It will not overwrite anything and will stop and warn you if conflicting files already exist.
Follow the instructions on the screen and click Next when you have Shipnixified your repository.
JavaScript bundling (only if you use npm)
If you don’t use npm at all, you can skip this whole section and proceed to adding Github repo
IHP Cloud supports using npm or npx in the project Makefile. This is more difficult to get properly working in a Nix flake. Therefore we work around it a bit, and get increased purity as a reward for the extra work.
Shipnix has best experience bundling node/npm with nix-npm-buildpackage, which takes a package-lock.json as package input and builds via Nix.
Add nix-npm-buildpackage as flake input
Add nix-npm-buildpackage as a flake input as shown below:
{
  description = "Shipnix server configuration for ihp-npm-shipnix";
  inputs = {
    nixpkgs.url = "nixpkgs/nixos-22.11";
    nixpkgs-unstable.url = "nixpkgs/nixos-unstable";
+   nix-npm-buildpackage = { url = "github:serokell/nix-npm-buildpackage"; };
  };
Then run
nix flake update
to pin a version of this package to your flake.
Example with Shipnix/IHP with esbuild and React
Here is an example that gives you React and Tailwind, but you can of course pick and for example omit the tailwind stuff.
Shipnix/IHP with Elm
Using bundlers like Parcel works fine in a dev environment, but compiling Elm through a bundler often fail in Nix flakes, because of too much bundler magic.
elm2nix is currently the the best way to compile elm purely in NixOS.
You can open a shell with elm2nix installed:
nix-shell -p elm2nix
And then run these commands to run the elm2nix files inside the same folder where your elm.json resides.
elm2nix init > elm.nix
elm2nix convert > elm-srcs.nix
elm2nix snapshot > versions.dat
Be sure to adjust the elm.nix file so the Elm build outputs a JavaScript file.
mkDerivation {
  name = "elm-app-0.1.0";
  srcs = ./elm-srcs.nix;
  src = ./.;
  targets = [ "Main" ];
  srcdir = "./src";
- outputJavaScript = false;
+ outputJavaScript = true;
}
When the project is shipnixified and elm2nix used, you can take a look at the repository and diff to adapt to the requirements of hosting your pure bundle on Shipnix.
Since folder structures can vary, we suggest just inspecting the example repository and diff below to figure out what needs to be done to get your Elm code running in production.
Full workaround
If nixifying your npm dependencies doesn’t fit your usecase, you can also place your build command in the nixos/scripts/before-rebuild file in your repository.
You will lose rigid reproducibility throug Nix, but you will gain the freedom to use npm in a similar way as you did before.
Add Github repository
Next, you need to let Shipnix know about your repository.
Make sure you have commited and pushed the generated Shipnix code to your repository.
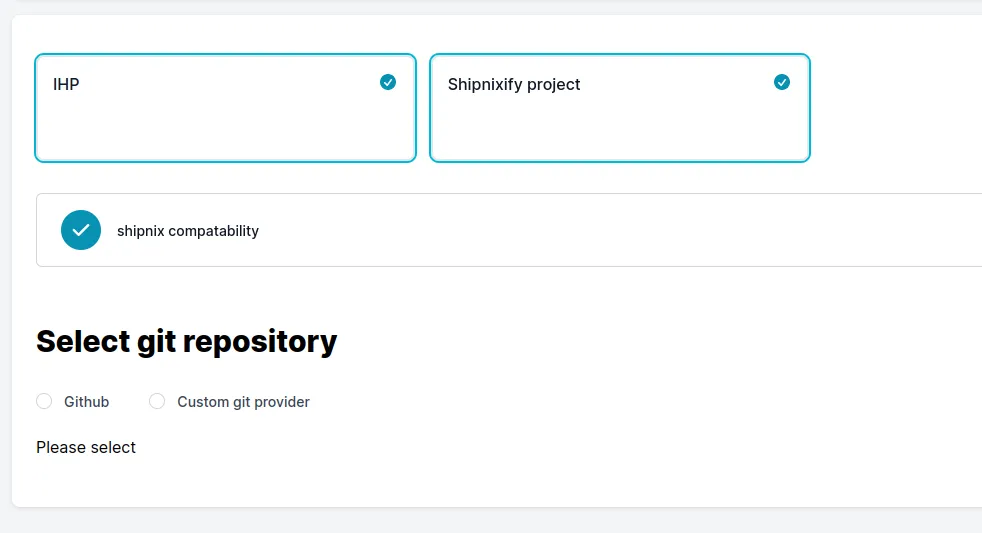
Select how you want to add the github repository and follow the instructions on screen.
Move over environment variables
Then you can copy over the necessary environment variables from IHP Cloud into this screen.
But please read this warning in red first:
Do NOT modify the DATABASE_URL variable. That could wipe your data on the IHP Cloud database during the provisioning phase.
Let Shipnix provision a new database for you, and later you can decide if you want to use this or go with a managed database host
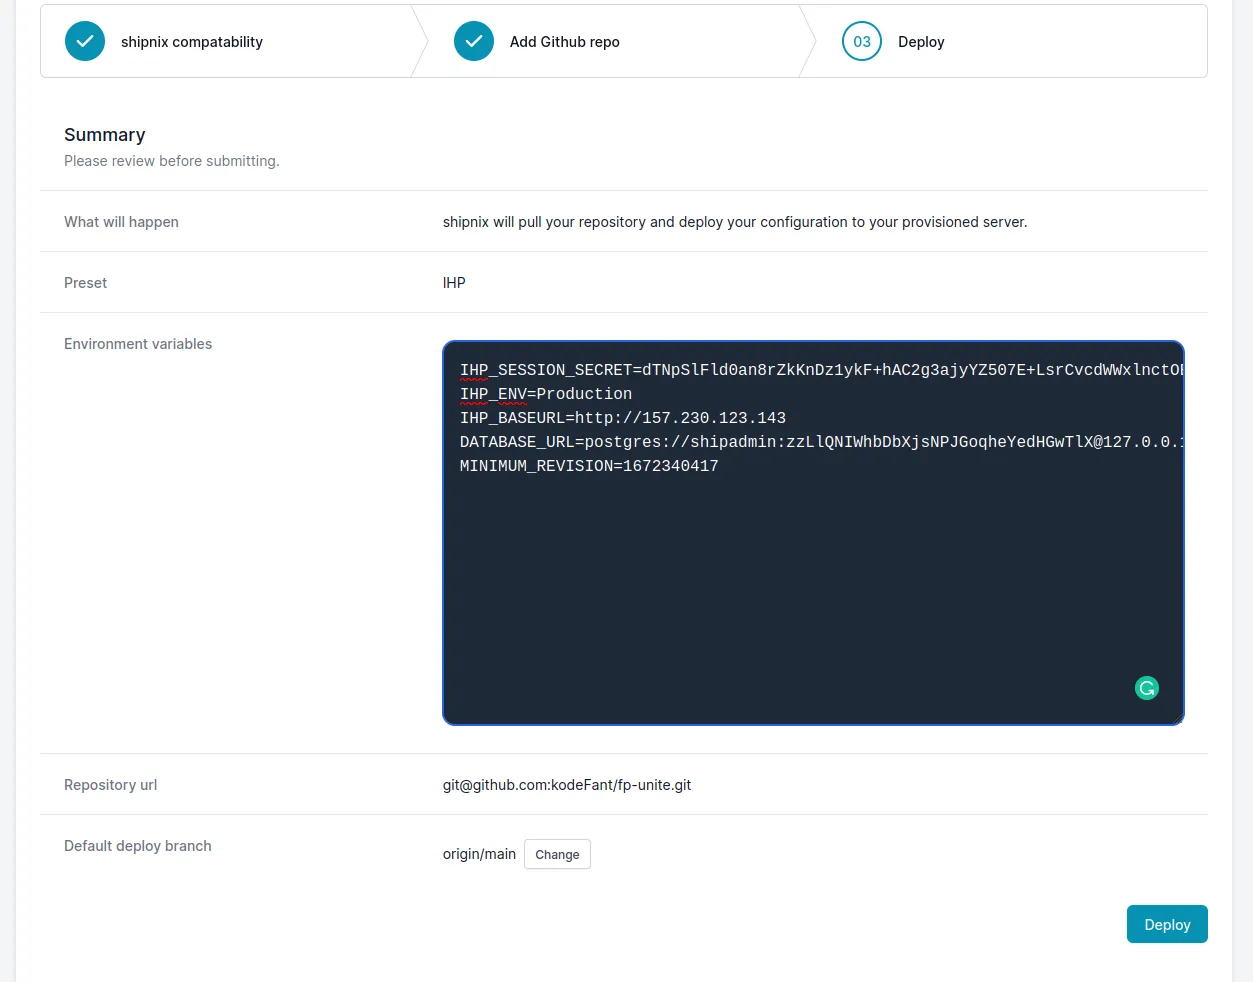
Make sure the Default deploy branch is the same branch where you ran the shipnixifier script. So if you ran the script on your main branch, the default deploy branch should be origin/main.
When you are ready, click Deploy. Be prepared that it could take a long time the first time you deploy.
If all went well with the provisioning, you should be able to see your app hosted on Shipnix by entering the server’s IP address.
If something failed, you should be able to try again by going back, maybe adjust something in your code and repeat the process.
Import data from IHP Cloud database
After provisioning, your database will be populated with whatever exists in you Fixtures.sql file in your Project.
You will probably want to move this data over to your new database.
Note: If you want to use a managed database, you can change your DATABASE_URL environment variable to the postgres string of such a database. However, depending on which provider you choose, your mileage may vary, and there might be permission issues for example with dropping the public schema. You might need to adjust the script if it doesn’t work properly
SSH into your new server:
ssh ship@yournewserverhost
Create a temporary folder for this migration step and cd into it:
mkdir -p /home/ship/db-migration
cd /home/ship/db-migration
First make a database dump file of from your old IHP cloud database.
Edit the IHP_CLOUD_DATABASE_URL with the IHP Cloud database url:
IHP_CLOUD_DATABASE_URL=postgres://your-old-postgres-uri-string
pg_dump "$IHP_CLOUD_DATABASE_URL" -a --inserts --column-inserts --disable-triggers | sed -e '/^--/d' > MigrationFixtures.sql
After this, you should have a database dump named MigrationFixtures.sql.
Next, you could copy the following commands to the server console and run:
set -o allexport; source /etc/shipnix/.env; set +o allexport &&
psql $DATABASE_URL -c "drop schema public cascade; create schema public;" &&
psql $DATABASE_URL -c "CREATE TABLE IF NOT EXISTS schema_migrations (revision BIGINT NOT NULL UNIQUE);" &&
psql $DATABASE_URL < /home/ship/server/build/ihp-lib/IHPSchema.sql &&
psql $DATABASE_URL < /home/ship/server/Application/Schema.sql &&
psql $DATABASE_URL < /home/ship/db-migration/MigrationFixtures.sql
This will reset the current database and load the production data to your server.
Run another deploy to verify that the data is there and everything is fine.
Then can delete your temporary migration folder when all the data is successfully passed over.
rm -rf /home/ship/db-migration
If your app uses IHP jobs, you should also enable it in your configuration file nixos/site.nix on your local machine by changing jobsEnabled to true.
You very last steps should then just be to add your domain name and enable https with LetsEncrypt.