Mastodon
Don’t want to abide by the rules of some other Mastodon instance?
Mastodon is simple to set up in NixOS, and Shipnix offers a very quick way to provision your own Mastodon instance.
Add domain record
Adding a domain to your Mastodon instance is necessary.
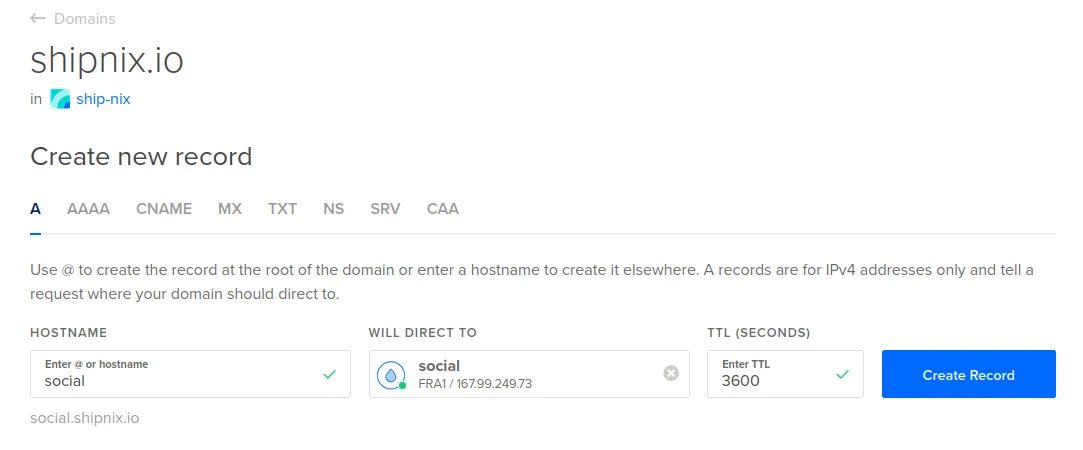
As soon as you have gotten an IP address assigned to your server, add an A record from for example social.yourdomain.com, mymastodoncommunity.com and point it to the IP address of your server.
On DigitalOcean, it looks like this:

Make necessary changes in configuration.nix
In your repository, go to nixos/configuration.nix, find the let in statement at the top.
Fill in your mastodon domain name to the mastodonDomain option and set it corresponding to the domain name you have added in the previous step.
Also, set the enableHttps option to true.
let
  enableHttps = false;
  mastodonDomain = "social.yourdomain.com";
in
Commit and push the changes, then click Deploy in the dashboard for your server in Shipnix.
If it fails, it’s because your DNS record has not propagated yet. Just give it some time and try again.
Add yourself as an admin user
Next, you must ssh into your mastodon server.
ssh ship@youripaddress.comInside the shell of your server, you can add yourself as a user with owner permissions.
mastodon-env tootctl accounts create yourmastodonusername --email you@youremail.com --confirmed --role Owner
After the command has succeeded, a generated password will be displayed.
Log in with your email and the generated password. Change the password if you want and start managing your new mastodon instance.
For full documentation on the Mastodon admin cli, refer to the Mastodon official docs.
You can access all of these commands from the shell of your server by prefixing with mastodon-env before the command.
For wider communities, add SMTP settings
If you want to host the instance for a wider community, you should also set up the SMTP settings.
This is needed for the Mastodon instance to communicate with your users via email for confirmation mail etc.